
The machine, in a browser tab.
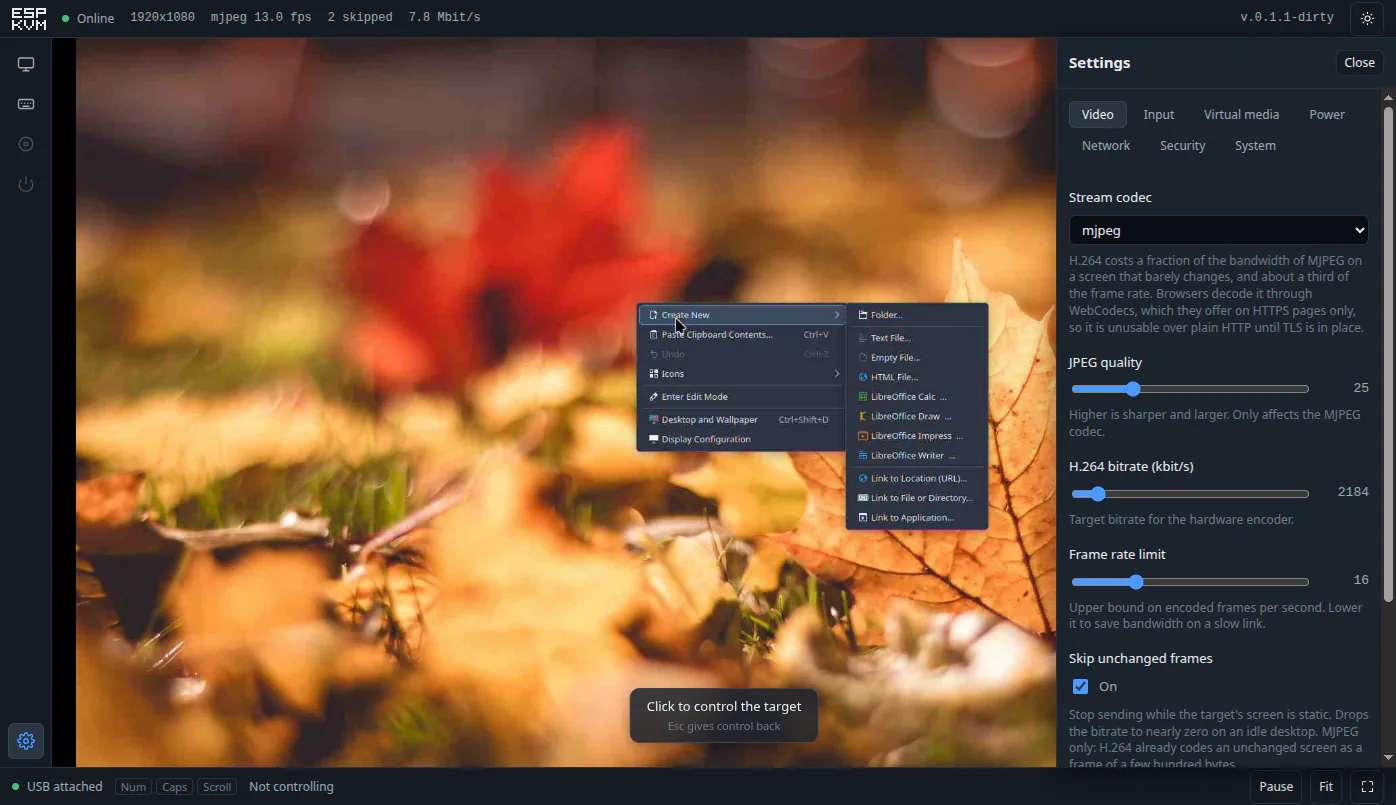
The console, driving a real machine: its desktop, its right-click menu, and the live status bar — all in a browser tab.
The point is to reach a machine that has no working operating system — a BIOS screen, a boot menu, a kernel that will not come up — from a device that costs a fraction of a commercial KVM-over-IP. It captures HDMI, presents itself over USB as a keyboard and mouse, hands the target a disk image to boot from, and serves the whole thing over HTTPS from a megabyte of firmware — the console inside it is 44 KB.
How it connects
Two cables to the target, one to the network. Nothing is installed on the target and nothing runs on it.
The target machine's HDMI goes to the capture board, which feeds the ESP32-P4 over MIPI CSI-2. The ESP32-P4 reaches the operator's browser over Ethernet, and plugs back into the target as a USB keyboard and mouse. target machine no OS needed TC358743 HDMI capture Geekworm C790 ESP32-P4 ESP-KVM firmware Waveshare P4-ETH your browser anywhere on the LAN HDMI CSI-2 HTTPS USB — keyboard and mouse the target cannot tell from real ones
Nothing runs on the target machine — which is the point, since it may not be running anything at all.
What it does
What the firmware ships with. Anything the hardware cannot support, the device shows disabled with the reason — it does not pretend.
Follows the target
A machine switching from an 800×600 firmware screen to a 1080p desktop is followed without intervention.
Clicks land where aimed
An absolute USB pointer, so the target’s mouse acceleration cannot drift the cursor away from the button you meant.
MJPEG or H.264
Both encoded by hardware. H.264 costs a fraction of the bandwidth on a screen that barely changes.
Boot from a disk image
A rescue or live image, handed to the target as a USB drive it can boot from — from a microSD card, or a small one kept in the device’s own flash with no card at all.
Updates itself
Two app slots and automatic rollback: an image that fails to start returns the device to the one that worked.
HTTPS and a login
A certificate the device issues itself on first boot, and a password you can clear with the board button if you forget it.
Lives in Home Assistant
Turn on MQTT and the device is auto-discovered as one Home Assistant device: temperature, viewers, video mode and target power as sensors, with power, reset and Wake-on-LAN buttons. TLS optional, off by default.
Reach it over WireGuard
A built-in WireGuard client, so the device stays reachable across the internet without being exposed on it. Split-tunnel over the existing link — the LAN keeps working — and it generates its own key, showing the public one to add to your peer. Off by default.
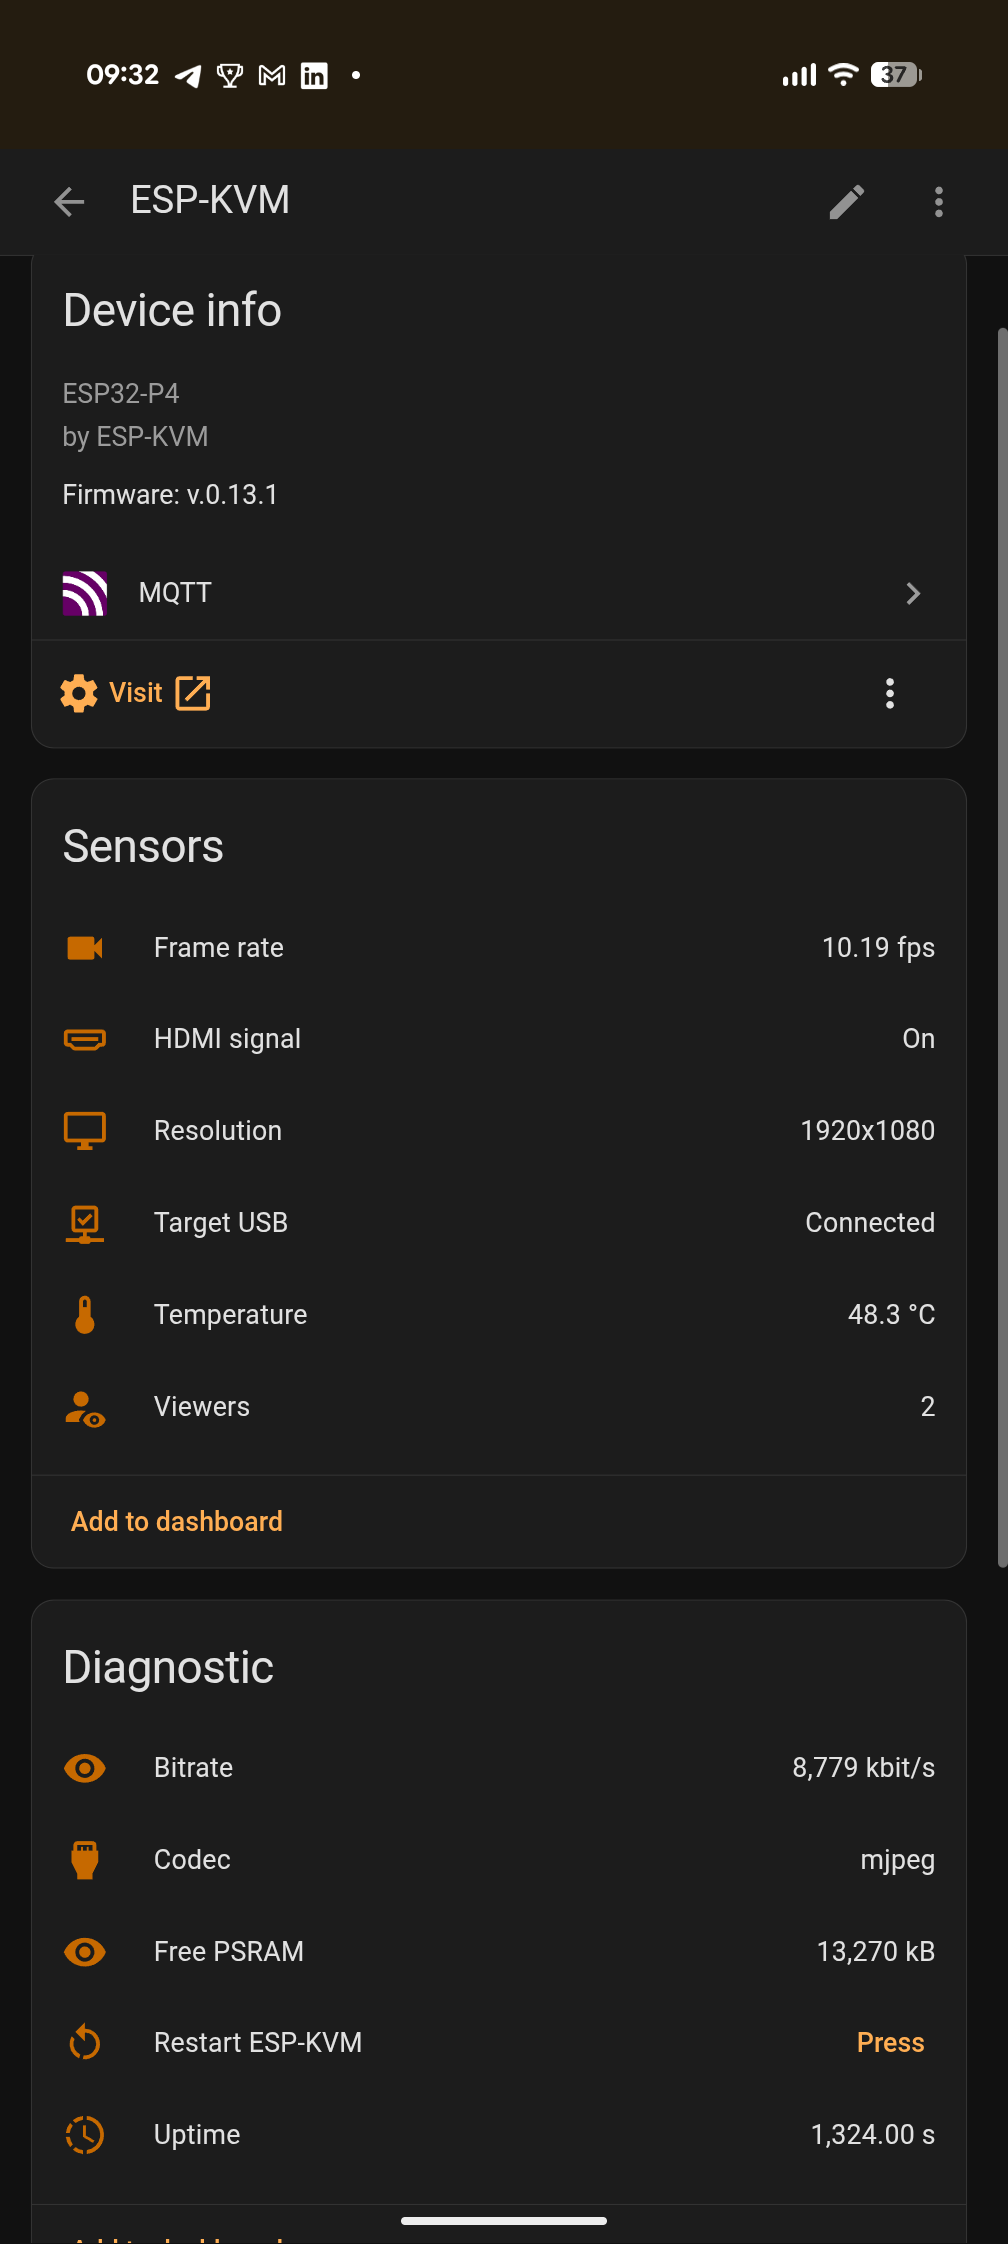
The same device in Home Assistant — every value here is reported live by the KVM over MQTT, discovered automatically.
Virtual media, honestly. The microSD is served read-only — this board cannot write it reliably — so images go on the card in a reader, formatted FAT32, up to 4 GB each. Reads run around 1.5 MB/s: quick for a rescue or minimal image, several minutes for a heavy graphical one. It is a known ESP32-P4 SD limitation, and the console tells you so. For the rescue case there is another option that sidesteps the card entirely: a small image (iPXE, memtest, a DOS floppy) kept in a 4 MB flash partition, served fast from memory and — because flash writes are reliable here — writable from the browser.
FAQ
How is this different from IPMI?
IPMI, the BMC chip built into server motherboards, manages a machine from the inside: real power control, internal sensors, POST codes, over a standard protocol. But it lives only on server-class hardware, and the full remote console is often behind a license.
ESP-KVM is external. It clips onto any machine with an HDMI output and a USB port, captures the physical video, and acts as its keyboard and mouse — bringing the remote console, virtual media and wake-on-LAN part of what a BMC does to hardware that has no BMC and never will: a desktop, a laptop, a mini-PC, an SBC, for about $40. It can press the machine’s power and reset buttons and read its power LED through optocouplers (ATX power control), though it does not read the host’s internal sensors the way a BMC does. Think of it as closer to PiKVM than to IPMI: not a replacement for a BMC on a server, but the useful slice of one for everything that never had a BMC.
Measured, not estimated
Every number here came off the hardware, at 1080p. The ones that contradicted the documentation are written down in the hardware notes.
| | MJPEG | H.264 | | --------------------------- | ----------------- | ------------ | | Frame rate | 20 fps | \~7 fps | | Idle screen | 0 kbit/s | 170 kbit/s | | Screen in motion | 8.5 Mbit/s | \~500 kbit/s | | Chip temperature, full load | 46 °C in open air | |
So H.264 is not the faster option — it is the one that fits down a narrow link. Browsers decode it through WebCodecs, which they only offer on secure pages, which is one reason the device serves HTTPS.
These are this board’s numbers, not the ceiling
The frame rates above come from one particular ESP32-P4, revision v1.3, and the biggest cost in the H.264 path is something that revision forces on us. Below silicon revision 3.0 the CSI receiver cannot hand over YUV420 and the encoder will not accept RGB, so every frame takes a detour through the pixel accelerator to change colour space — measured at \~104 ms of the \~150 ms a 1080p frame costs. On revision 3.0 and later that detour does not exist: the encoder accepts RGB directly, so the conversion pass disappears.
We have not run that, because we do not have that silicon. But the reason is specific and checkable — it is a revision test in Espressif’s own driver, quoted in the hardware notes— so a newer board should move H.264 from a bandwidth trade to a straight win. We did overlap the conversion and the encode on two tasks here, but it only nudged the rate: measurement showed the wall is PSRAM bandwidth, not serialised compute, so the conversion stays the limit until the silicon removes it.
Where it stands
An honest status board, the same one the device reports about itself.
| Video capture, resolution changes, MJPEG, H.264 | works | | ---------------------------------------------------------------- | ------------------------ | | Keyboard, absolute and relative pointer, media keys, paste | works | | Touch mode for phones and tablets (trackpad, on-screen keyboard) | works | | Multiple viewers, one in control at a time with takeover | works | | HTTPS, login, physical password reset | works | | Firmware updates over the network, with rollback | works | | Thermal protection | works | | Virtual media — boot the target from a disk image | works (card or on-flash) | | Guessing the target’s OS from how it enumerates USB | works | | User macros — replayable key sequences | works | | Wake-on-LAN (no ATX wiring) | works | | Static IP addressing, or DHCP | works | | ATX power control (power/reset buttons, power-LED sensing) | works | | Home Assistant over MQTT (auto-discovered sensors and buttons) | works | | WireGuard VPN client (split-tunnel, on-device key generation) | works | | HDMI audio | not yet |
Not for the public internet. There is a login and there is TLS, but nothing here has been through a security review, and a device holding a keyboard on someone else’s machine is worth more to an attacker than most things on a network. Keep it on a network you trust, or reach it over the built-in WireGuard client.
What you need
Two boards and three cables, plus one optional module for power control. Everything is off-the-shelf; any equivalent works, these are the ones this project is built and tested on.

The device
Waveshare ESP32-P4-ETH
ESP32-P4 with 100M Ethernet, a Raspberry-Pi-compatible CSI connector, USB-C OTG and a microSD slot. Another ESP32-P4 board with Ethernet and the same CSI connector can run it too — the pins are set in menuconfig, not the code.

The capture
Geekworm C790
A TC358743 HDMI → MIPI CSI-2 bridge that turns the target’s HDMI into a camera stream the ESP32-P4 can read. Any other TC358743 capture board should do just as well.
Power control (optional)
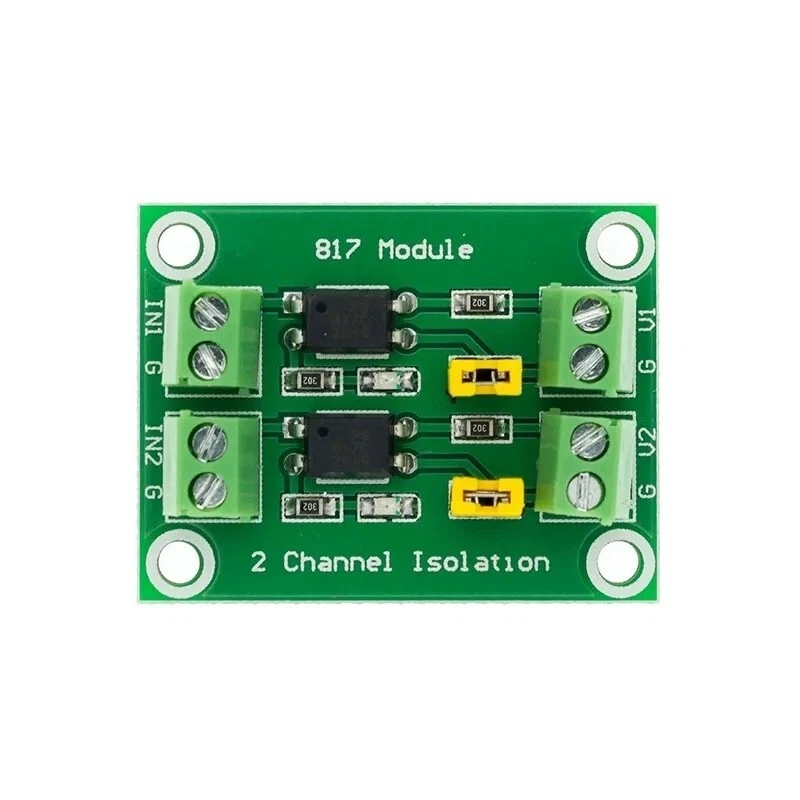
PC817 optocoupler module
A pair of these cheap two-channel boards lets ESP-KVM press the target’s power and reset buttons and read its power LED, electrically isolated from the machine. Skip it and everything else still works. Wiring is in docs/wiring.md.
Cables: a CSI ribbon between the two boards, HDMI from the target, and USB-C from the board to the target. A microSD card if you want boot-from-image.
Getting started
The easiest way is flashing straight from the browser — Chrome and Edge can talk to the board over USB, and nothing needs installing. If you would rather use the command line, take the full-flash archive from the releases page, unpack it, and write it with esptool:
esptool --chip esp32p4 -b 921600 write-flash @flash_argsThen plug in Ethernet, HDMI from the target and USB to the target, and open `https://espkvm.local/`. The browser will warn about the certificate once — the device signed it itself, and nothing else vouches for it. Sign in as `admin / admin`; the console will not go any further until that password is changed.
Accepting the warning is enough to watch the screen. For H.264 and for the keyboard and mouse the browser needs a trusted connection, so download the device’s CA (Settings → Security) and add it to your trusted authorities once — the READMEhas the steps.
Latest release release notes
Built on someone else’s work
This project exists because of Jonathan Rowny and his p4kvm proof of concept. He was the one who got an ESP32-P4 to pull frames off a TC358743 at all, and put it in the open with a working demonstration for anyone to build on — this is that thing built on. Two pieces of his work are reverse engineering no datasheet would have handed us: the TC358743 bring-up sequence, and the direct programming of the ESP32-P4’s `MIPI_CSI_BRIDGE` registers, which the camera API does not expose. Both still carry this firmware; the layers above them were rewritten. Thank you, Jonathan, for publishing it.
Support and community
ESP-KVM is free and open source. If it saved you a trip to a dead machine you can buy me a coffee — entirely optional. And if you would rather help build it, issues, ideas and pull requests are just as welcome.

Ask a question Report a bug Contribute on GitHub
Built with the help of these contributors: