AIO Ep22. Configuring Port Mirroring on PVE Host and Suricata IDS Firewall
This article is currently an experimental machine translation and may contain errors. If anything is unclear, please refer to the original Chinese version. I am continuously working to improve the translation.
Background
My HomeLab PVE host has long been running a chaotic mix of workloads — from simple SMB/Syncthing file sharing, various scrapers and databases, to Windows/Linux VMs for development.
Although I’ve already configured proper internal firewall rules in the PVE console, I still notice unexplained and hard-to-trace internet traffic in Netdata monitoring. I’ve used tcpdump to investigate some of it, but it’s time-consuming and tedious.
So I decided to set up enterprise-grade traffic monitoring and analysis capabilities — something that can listen to all internal network traffic, perform DPI (Deep Packet Inspection) to understand application-level protocols, log events, and provide a dashboard for inspection.
An IDS (Intrusion Detection System) is a common feature in such network analysis tools. It automatically flags suspicious traffic based on rules, helping detect misconfigurations or signs of malicious intrusion.
---
At first, I tried some truly late-night enterprise-grade products, like FortiGate and Sophos free trial VMs. But the experience wasn’t satisfying — their configurations were complex and obscure, and event logging/viewing wasn’t clear enough.
Eventually, I settled on the open-source Suricata paired with the frontend Evebox. While Evebox’s UI is a bit barebones, it basically meets my needs and has very low CPU and memory usage.
Installation
LXC Container and Port Mirroring
Create a Debian 12 LXC container on PVE, name it `suricata` for example. First, add a normal network interface `eth0` attached to `vmbr0`, and assign it an IP address for regular access to the container.
In the PVE Dashboard, go to `Node - System - Network`, and create a Linux bridge `vmbr1`. This bridge will be used solely for traffic mirroring — don’t assign an IP address or gateway, and don’t bind any physical interface yet.
Run the following script on the PVE host to mirror all traffic from VMs, containers, and the host itself to the `vmbr1` bridge:
| 12345678910111213141516171819202122232425262728 | #!/bin/bashapply\_tc\_rules() { local port\_name=$1 echo "Applying tc rules to $port\_name" tc qdisc del dev $port\_name root tc qdisc del dev $port\_name ingress tc qdisc add dev $port\_name ingress tc filter add dev $port\_name parent ffff: protocol all u32 match u8 0 0 action mirred egress mirror dev vmbr1 tc qdisc add dev $port\_name root handle 1: prio tc filter add dev $port\_name parent 1: protocol all u32 match u8 0 0 action mirred egress mirror dev vmbr1}apply\_tc\_to\_fwpr\_ports() { local bridge\_port="vmbr0" apply\_tc\_rules $bridge\_port for port in /sys/class/net/$bridge\_port/brif/fwpr\; do if \[ -d "$port" \]; then port\_name=$(basename "$port") if \[\[ $port\_name \== fwpr\ \]\]; then apply\_tc\_rules $port\_name fi fi done}apply\_tc\_to\_fwpr\_ports | | ----------------------------------------------- | ------------------------------------------------------------------------------------------------------------------------------------------------------------------------------------------------------------------------------------------------------------------------------------------------------------------------------------------------------------------------------------------------------------------------------------------------------------------------------------------------------------------------------------------------------------------------------------------------------------------------------------------------------------------------------------------------------------------------------------------------------------------------------------------------------------------------------------------------------------------------------------------------------------- |
The syntax of these `tc` (traffic control) commands is admittedly bizarre — take for instance `tc filter add dev vmbr0 parent ffff: protocol all u32 match u8 0 0 action mirred egress mirror dev vmbr1`. Not many commands have such long and cryptic parameter lists. Since I don’t fully understand it myself, I won’t go into detail. Interested readers can look up `tc` usage — this was the simplest method I found for port mirroring on Linux.
Back to the topic: the `apply_tc_rules` function mirrors bidirectional traffic from a given port to `vmbr1`, and `apply_tc_to_fwpr_ports` applies this rule to `vmbr0` and all interfaces bridged to it.
After running the script, all traffic on `vmbr0` gets copied to `vmbr1`. (Note: if new VMs or containers are added later, you’ll need to re-run the script or manually apply the rules to new interfaces.)
Now, add a second network interface `eth1` to the `suricata` container, connected to `vmbr1`. No IP configuration is needed. This way, inside the container, you can listen to all host traffic via `eth1`. You can verify this with tcpdump.
Suricata
As mentioned earlier, Suricata is a high-performance, open-source network analysis and threat detection engine. We’ll run it inside the LXC container, listening on `eth1`.
The official Debian package is outdated, so follow the official guide to compile from source: <https://docs.suricata.io/en/latest/install.html>. Be sure to run `make install-conf` to generate default configuration files.
Set up the systemd service file `/etc/systemd/system/suricata.service`:
| 12345678910111213 | \[Unit\]Description=Suricata Intrusion Detection ServiceAfter=syslog.target network-online.target\[Service\]\# Environment file to pick up $OPTIONS.#EnvironmentFile=-/etc/default/suricataExecStartPre=/bin/rm -f /usr/local/var/run/suricata.pidExecStart=/usr/local/bin/suricata -c /usr/local/etc/suricata/suricata.yaml --af-packet --pidfile /usr/local/var/run/suricata.pid $OPTIONSExecReload=/bin/kill -USR2 $MAINPID\[Install\]WantedBy=multi-user.target | | ----------------- | ------------------------------------------------------------------------------------------------------------------------------------------------------------------------------------------------------------------------------------------------------------------------------------------------------------------------------------------------------------------------------------------------------------------------------------------------------------------- |
Modify the Suricata config file `/usr/local/etc/suricata/suricata.yaml` as needed:
| 123 | \# (Configuration is long; refer to comments and adjust as needed. Only essential parts shown below)af-packet: \- interface: eth1 \# Change to the interface you want to monitor | | --- | --------------------------------------------------------------------------------------------------------------------------------------------------------------------------------- |
Before starting, use `suricata-update` to download the default set of detection rules provided by Suricata.
Then run `systemctl daemon-reload` and `systemctl enable --now suricata` to start the Suricata service. If everything goes smoothly, Suricata should now be running:
| 123456 | \# systemctl status suricata● suricata.service - Suricata Intrusion Detection Service Loaded: loaded (/etc/systemd/system/suricata.service; enabled; preset: enabled) Active: active (running) since Tue 2026-07-14 12:59:51 UTC; 1s ago Process: 2792 ExecStartPre=/bin/rm -f /usr/local/var/run/suricata.pid exited, status=0/SUCCESS) Main PID: 2793 (Suricata-Main) | | ------ | ------------------------------------------------------------------------------------------------------------------------------------------------------------------------------------------------------------------------------------------------------------------------------------------------------------------------------------------------------------------------------------ |
By default, Suricata writes events to `eve.json` under `/usr/local/var/log/suricata/`. This is a continuously growing JSON file, so you’ll need to set up logrotate yourself.
My `/etc/logrotate.d/suricata` config for reference:
| 123456789101112 | /usr/local/var/log/suricata/\.log /usr/local/var/log/suricata/\.json{ daily rotate 1 missingok nocompress create 640 root root sharedscripts postrotate /bin/kill -HUP \`cat /usr/local/var/run/suricata.pid 2>/dev/null\` 2>/dev/null \|| true endscript} | | --------------- | ------------------------------------------------------------------------------------------------------------------------------------------------------------------------------------------------------------------------------------------------------------------------------------------- |
After setup, test rotation manually with `logrotate -f /etc/logrotate.d/suricata`.
Suricata installation is now complete. It offers many advanced features — see the official documentation: <https://docs.suricata.io/en/latest/what-is-suricata.html>
EveBox
EveBox is a frontend that consumes and processes Suricata events.
Download the binary from the official site and place it in `/usr/local/bin/evebox`.
Set up a systemd service `/etc/systemd/system/evebox.service` to run EveBox and consume Suricata events:
| 123456789101112131415161718 | \[Unit\]Description=EveBox ServerAfter=network-online.target suricata.serviceWants=network-online.targetRequires=suricata.serviceDocumentation=https://evebox.org/docs/\[Service\]Type=simpleExecStart=/usr/local/bin/evebox server -c /etc/evebox/config.yamlRestart=on-failureRestartSec=5sLimitNOFILE=65535User=rootGroup=root\[Install\]WantedBy=multi-user.target | | --------------------------- | ---------------------------------------------------------------------------------------------------------------------------------------------------------------------------------------------------------------------------------------------------------------------------------------------------------------------------------------------------------------------- |
Create the config file `/etc/evebox/config.yaml` (full example available here):
| 1234567891011121314151617181920212223242526272829 | \# EveBox Server configuration file.http: host: 0.0.0.0 tls: enabled: trueauthentication: required: falsedatabase: \# Database type: elasticsearch, sqlite. type: sqlite retention: \# Only keep events for the past 7 days. days: 7 \# Maximum database size. size: "15 GB"\# The server can process a log file directly, eliminating the need for a\# separate agent if running on the same machine.input: \# Toggle to disable input without commenting it out. enabled: true \# Suricata EVE file patterns to monitor and read. paths: \- "/usr/local/var/log/suricata/eve.json" \- "/usr/local/var/log/suricata/eve.\*.json" | | ------------------------------------------------- | ---------------------------------------------------------------------------------------------------------------------------------------------------------------------------------------------------------------------------------------------------------------------------------------------------------------------------------------------------------------------------------------------------------------------------------------------------------------------------------------------------------------------------------------------------------------------------------------------------------------------------------------------------------------- |
Start the service with systemd, and you can access the web interface directly. The JSON data from Suricata will be stored by EveBox in `/var/lib/evebox/config.sqlite`, automatically rotated based on the 7-day and 15 GB limits.
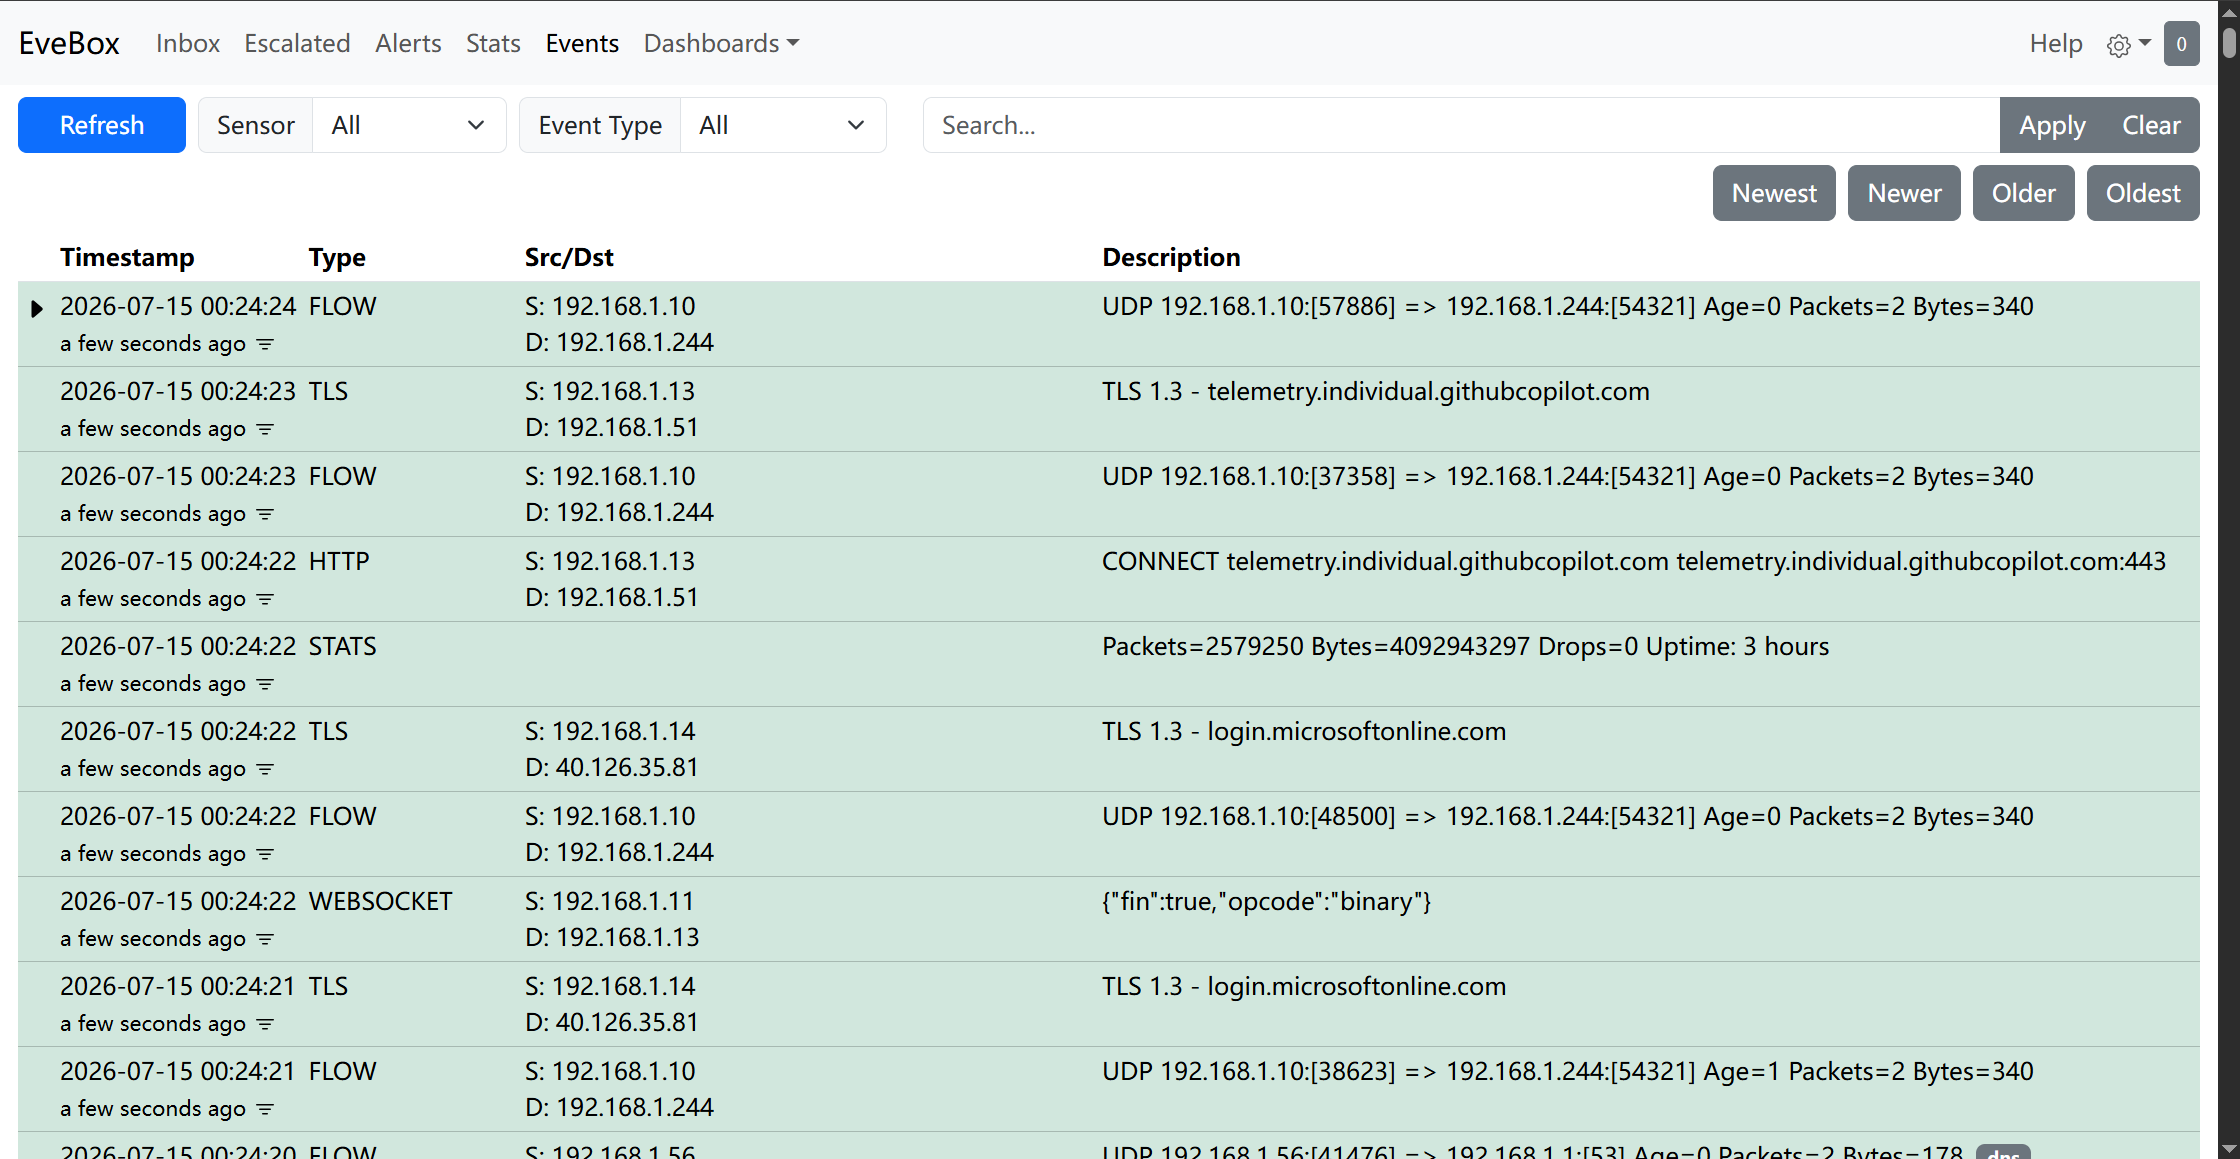 List of captured events
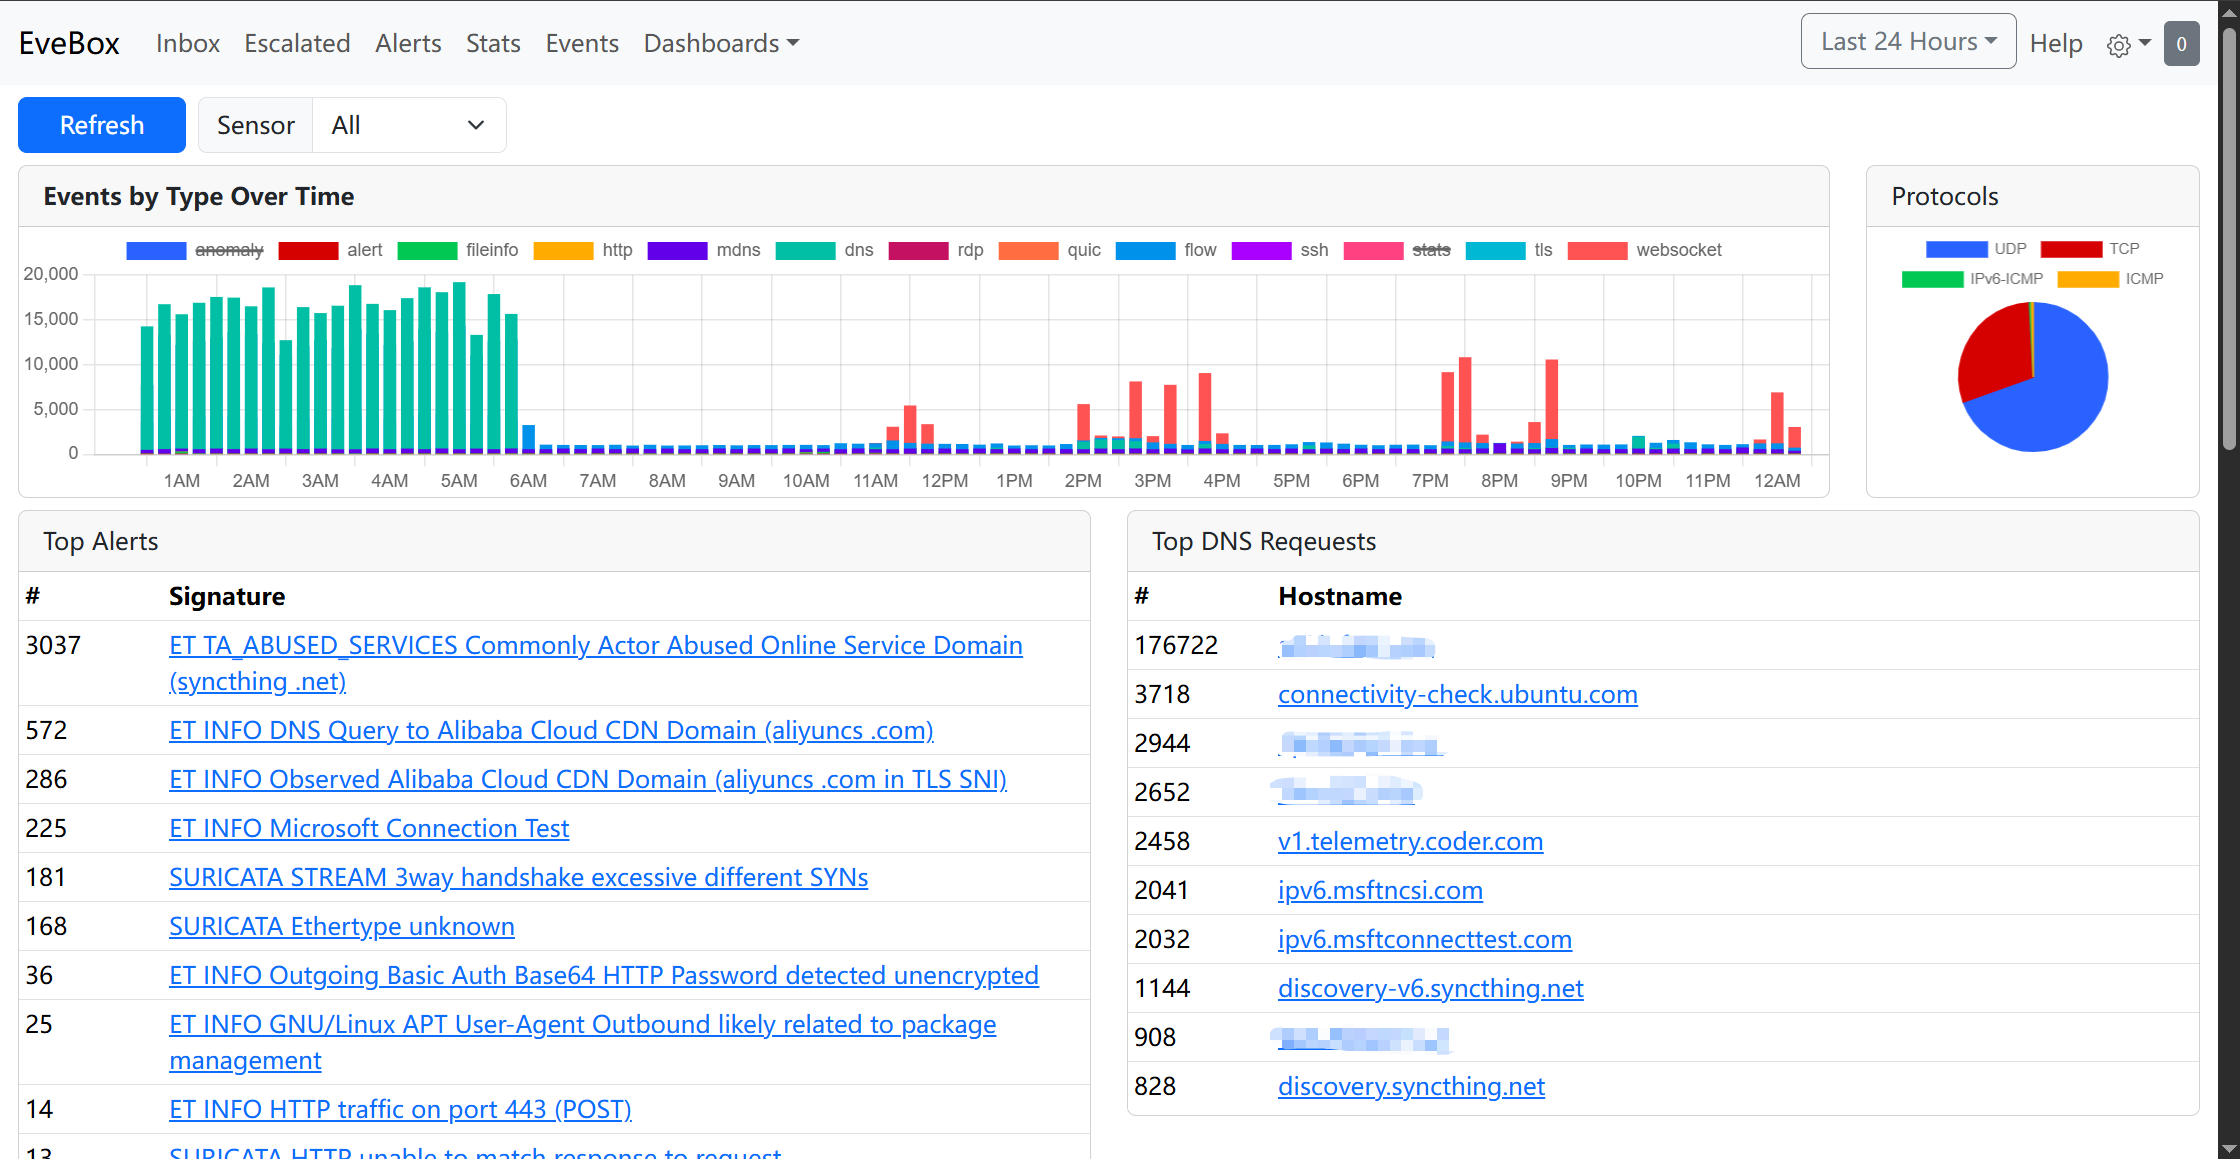 A monitoring dashboard
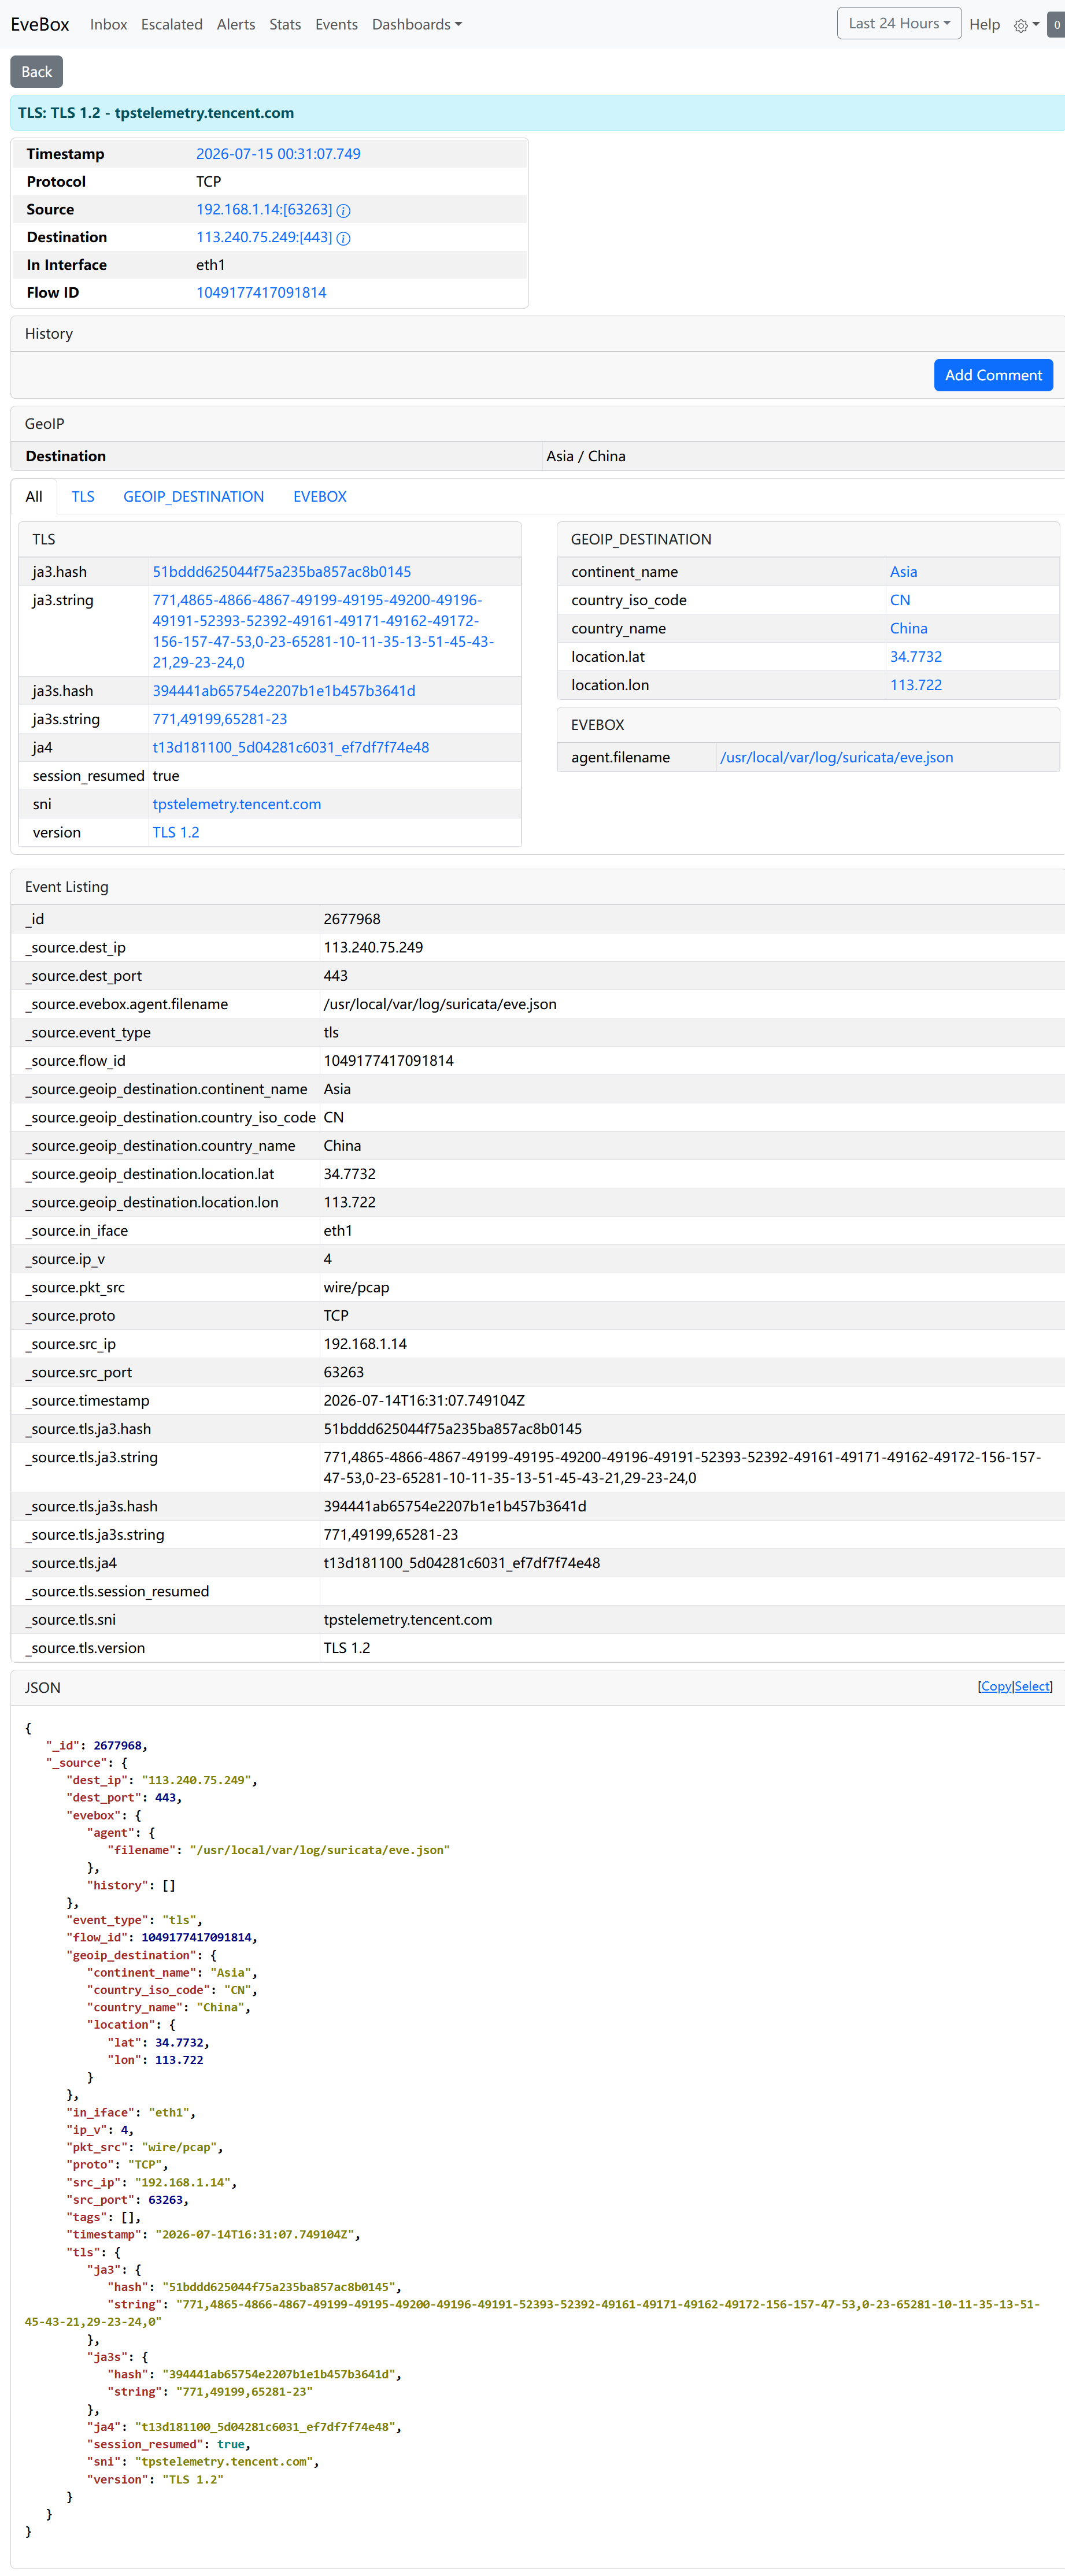 An example TLS event, with different fields identified for various traffic types
This article is licensed under the CC BY-NC-SA 4.0 license.
Author: lyc8503, Article link: <https://blog.lyc8503.net/en/post/22-network-ids/> If this article was helpful or interesting to you, consider buy me a coffee¬\_¬ Feel free to comment in English below o/